Showing posts with label hardware. Show all posts

Monday, June 17, 2013

Vintage Dresser Done!

Photo Jun 15, 5 21 24 PM
I’ve been painting like a mad woman all weekend.  Finally, I’m back at my day job on Monday so that I can get some rest (did I say that?).

Photo Jun 15, 5 20 22 PM

I finished this chest of drawers over the weekend and the companion dresser should be done in a day or two after I get around to giving it a coat of poly.

Photo Jun 15, 5 11 42 PM

I can’t get enough of retro hardware…a lot of thought and imagination was put into creating all those cool circular, ameba, and boomerang shapes!  I gave these tarnished brass pulls a fresh coat of brushed nickel.  

Photo Apr 23, 7 14 16 PM

Photo Apr 23, 7 17 10 PM

Here’s a before shot of the chest.  Check back later to see my plans for repurposing the matching full size headboard.  (It won’t be a headboard for much longer!)

Monday, May 13, 2013

Furniture Update…

Photo May 11, 2 11 15 PM

I recently finished three more pieces of furniture that I want to share.  The dresser has already found its new home so I only have two on the market at the moment.

Photo May 11, 2 13 47 PM


I don’t have a “before” shot of this coffee table, but it was just a plain, brown color, in fairly good shape…

Photo May 11, 1 54 42 PM

Photo May 11, 1 58 36 PM

I’ve held onto this little dresser for quite a while and finally got the calling to work on it.  This wasn’t quite the Photo Sep 11, 11 56 42 PMlook I was going for.  I should have just dry brushed the white topcoat rather that painting it a solid white and then removing the paint by sanding.  It turned out a little too spotty for my taste…but hey…it sold right away.  So what do I know?

And finally, here’s a little bed table/cabinet that I picked up at a 50%off sidewalk sale at a thrift store.  That means in set me back $5 plus tax.  My only investment was the oversized, square chrome pull from IKEA.  But the hardware is always the eye candy and my favorite part of the project.   Well worth it!

Photo May 11, 2 03 55 PMPhoto Mar 11, 8 46 01 PM

It’s funny how I just hated that tacky Mediterranean look from the 60’s and 70’s, and now I get so excited if I find a piece out there.  It’s amazing what a little paint can do…

Wednesday, April 3, 2013

Camper Update!

We’ve been working our buns off on our little 18’ Go-Tag-A-Long Travel Trailer.  The interior is becoming very comfortable and livable. It’s starting to feel like home.  Randy is a great sport about how I choose to decorate the camper.  His only two requests were that I DO NOT paint the paneling (I guess it adds to the 70’s ambience?) And also, he wanted it gender neutral…not ruffles or gingham.  Here’s a little of what we’ve done.
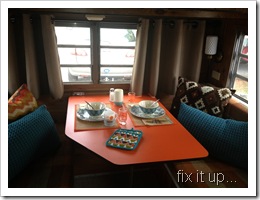
Photo Mar 29, 12 18 53 PM

This view shows the new curtain on the large front window.  (More on curtains later.)  Also, this great orange laminate was discovered on the table underneath a filthy layer of “granite” contact paper. Earth tone cushions were embraced for their “70ish style”…cleaned and left original. Original sconces got a good scrubbing.  Also, new carpet tiles.

2012-12-16 14.50.24dinette

The contact paper
shown on table above
before the exciting
discovery underneath.


My kitchen iskitchen & dinette still a work in progress.  I ripped off the old wall covering and replaced it with “hammered copper” squares from Home Depot.  Randy made the wood grid for my sink topper.  It practically doubles my counter space…ha ha.  I accessorized with fun IKEA stuff!

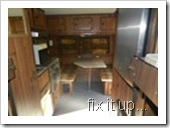
Note in the before shot, the counter top was also covered with the “granite” contact paper.

Photo Dec 18, 4 34 13 PM (1)Photo Jan 13, 4 35 09 PM

I was horrified at the cost of having to purchase four quilt sets for our bunks.  Then I realized that I could purchase two full/double size quilt sets at a significant savings.  Each came with two pillow shams.  I split the quilts down the middle and finished off the cut edge.  Then I put the cut edge up against the wall side of the bunk.
   Photo Mar 28, 6 57 29 PMbottom bunk

All the cabinet and closet doors were removed and taken down to my workshop.  Each door was wiped clean.  Then I used liquid scratch remover on the entire surface. It’s amazing how the scratches and gouges just disappeared.  Then I repainted all of the edges of drawers and doors a medium brown.  The old hardware was removed and replaced by knobs and pulls that have a slight southwestern feel and are edged in copper.  I’m attempting to use the copper accents throughout the entire camper.

2012-11-10 10.45.10

Photo Mar 28, 6 58 39 PMNote the lovely blue carpet in the before shot above.  The after picture gives a glimpse of the mocha colored carpet tiles.  I’ve kept most of the permanent fixtures neutral colors, and I’m accessorizing with the fun, bright colors since they can be changed out at little cost and effort.

2012-12-15 17.23.49

Photo Jan 13, 4 36 00 PMNeither of the shots above are a very good quality, but I just wanted to illustrate the location of my new microwave.  You will notice a cabinet directly below the fridge.  I took the door off and had to cut the opening slightly larger. An electrical receptacle was installed inside the cabinet when we had the wiring updated after purchasing the trailer.  So then I was able to slip the microwave into the new opening and secure with wood strips.  Then I framed out the opening and reframed the fridge to blend the two together.  They were painted the same brown as the cabinet door edges. 

Next on my list is installing a “portable” air conditioner that will sit below the microwave. I will take out both the old furnace and the cabinet below the furnace.  This will allow enough room for the air conditioner to roll into place.  It vents through a five inch hose similar to that of a clothes dryer.  That hose will attach to the existing furnace vent opening that goes to the outside.

A bathroom update is on the horizon also.  More on that later!

Tuesday, November 6, 2012

Stripes

OK, I know I’ve done this same look before.  But my first drop leaf table, painted with multi-color stripes was received so well,  my thinking was “why reinvent the wheel?”. So I found myself with another small, drop leaf table, and also a corner desk.  Their lines were both screaming “stripes” to me.  So I gave in to my lack of creativity.

Photo Oct 24, 4 11 47 PM Photo Oct 24, 4 22 10 PM 


Red has also been a kick I’ve been on lately, so I spray painted the metal base and metal chairs of the table with a gloss red.  And while I was at it, I painted another metal chair from my stash glossy red to go with the desk. 

Photo Oct 24, 4 16 13 PM (1)

Photo Oct 24, 4 22 52 PM (1)


And to top it off, why not cover all the seats with burlap?  One of my favorite default fabrics to reach for.

So here’s how the sets turned out…

Photo Oct 24, 4 15 05 PM

Photo Oct 24, 4 21 10 PM


I’m pleased with the final result, but I am going to try to move on… leave the stripes alone for a while. 

Oh, and while I’m at it, here’s what these guys looked like in their previous lives: (Crap…no before shots of the desk)

Photo Oct 04, 10 05 29 AM (1)

Photo Oct 04, 10 04 59 AM

Monday, November 5, 2012

Fixer Upper

This little guy has been long gone, but I just wanted to share…

green table


Man, this was a sad little table.  I grabbed it off of Craig’s List just because it was so cheap.  I thought whatever I get out of it, I’ll probably make a decent return.  I used all materials I already had at home.


2012-07-29 05.23.03  Green paint that was 10 years old.

2012-07-29 05.21.57 And drawer pulls that were recently attached to a tree in my backyard.

2012-07-29 05.22.10 The close ups shows how rough the surface was.  So I decided to embrace that condition and rough it up even more.  I also used my orbital sander to take all the hard edges off, rounding the edges, corners on the drawer, trims, etc.

Then with a quick “glaze” of diluted brown paint to fill in all of the imperfections, I was satisfied!

Here’s what I started with:

Photo May 10, 11 16 13 AM

Photo May 10, 11 16 34 AM

Saturday, November 3, 2012

“I Need a Home!”

This is another piece that I recently completed.  As of right now, it is still posted on Craig’s List.  It was solid, sturdy dressing table and in good condition, so the improvements were strictly aesthetic. 

Photo Oct 24, 4 24 54 PM

I’ve really been having fun with painter’s tape lately, so I decided to give a Greek Key design a whirl.

Photo Oct 24, 4 25 42 PM  And of course, I HAD to dip the legs…

Photo Oct 24, 4 25 30 PM

and I got so lucky finding these ceramic pulls at World Market that were the perfect shade of coral…

Photo Oct 24, 4 25 24 PM

and finally, I painted the chair white and added this GREAT Ralph Lauren paisley fabric to the seat (actually a table cloth I found on clearance at TJ Maxx).

Photo Oct 24, 4 26 33 PM

Photo Oct 24, 4 26 39 PM


And here’s what I started with…

2012-08-19 10.43.00